
When it comes to security concerns, email certainly remains at the top. Most people conduct business, receive bills, and perform a number of tasks with personal information over email.
The last thing you want is for your Gmail account to fall into the wrong hands. Luckily, Google provides 2-step verification (also known as multi-factor authentication) for free. In this article, we will explain how Gmail 2-step verification works and exactly how to set it up.
What is Gmail Two-Step Verification
Simply typing your password in is considered one-step authentication. On the other hand, two-step authentication requires a unique code sent to your phone.
This requires an extra step to ensure that you have access to your physical device and your passwords. The code you receive is one-time and unique, so it cannot be discovered and reused by someone else trying to access your account.
How to Enable Gmail 2-Step Verification
Setting up your 2-step verification for Gmail is fairly straightforward. You’ll just need access to the internet, your phone of choice, and about 5 minutes. Here are the exact steps to follow:
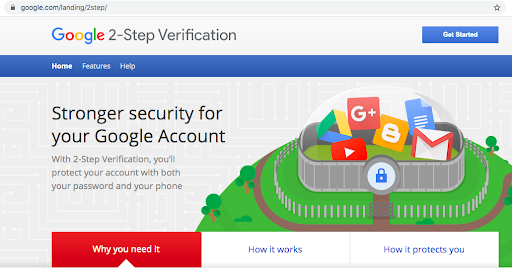
Step 1: Navigate to Google’s 2-Step Verification page. Then click on the “Get Started Button”:
Step 2: If you are not already logged into your Google account, you will be taken to a page where you can sign in:
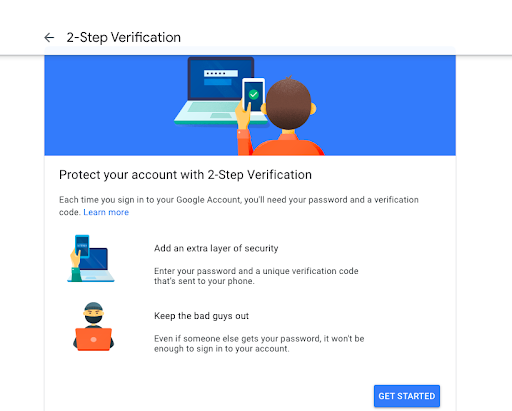
Step 3: Once you sign in to your Google account — or if you were already signed in — you will now be taken to the next page in the process. You will need to click on the “Get Started” button near the bottom of this page:
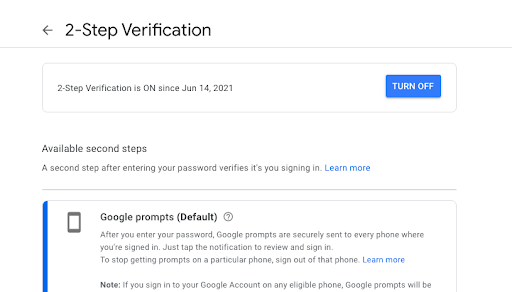
Step 4: On this next page, you will see your devices which are available to receive the verification code:
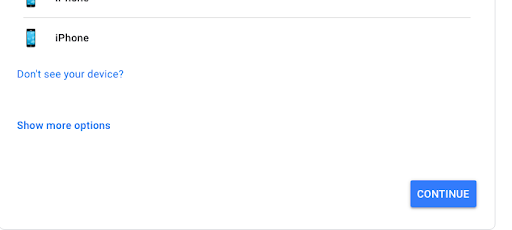
Confirm your device is listed. This will be the phone you use as your second step in the 2-step verification process. If you do not see your device, make sure to sign into your Google account on that device.
Step 5: After that, you have the following three options to choose from regarding how your 2-step verification will work.
(Option 1): You can choose to get a notification prompt from Google on your phone. How this option works is this: when you see the Google verification notification, simply tap it to review the message and sign in.
If this is your desired option, you’ll just scroll down on the current page and click “Continue” (then skip to step 8):
On the next page, you’ll need to add your phone number as a backup option. This is in case you aren’t able to access your Google notifications when needing to verify your logins in the future.
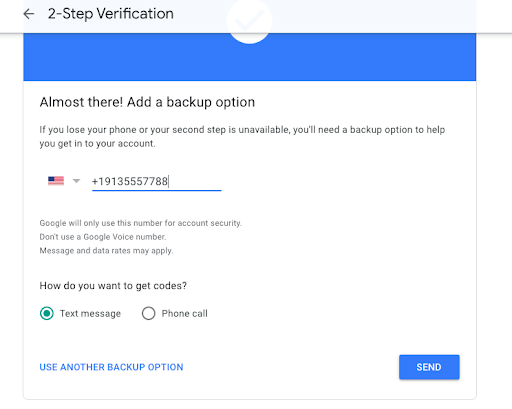
Then click on “Send” to receive your code and be taken to the next screen:
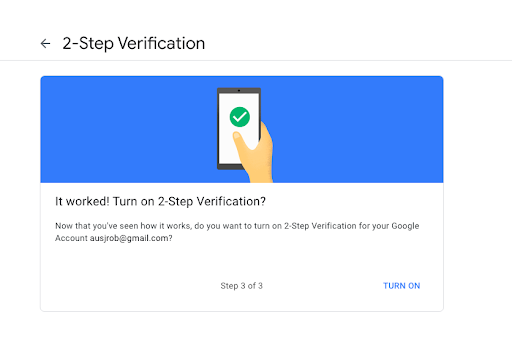
Enter code and hit “Next”. After your backup phone number is confirmed, you’ll be taken to a page where you need to confirm your details and hit “Turn On”:
After you hit “Turn On”, you’re all set! You’ll be taken to a confirmation page where you can also adjust your verification settings if you wish:
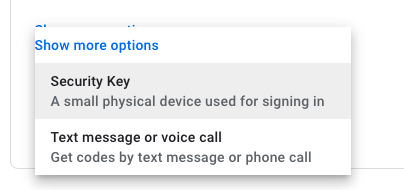
(Option 2): Instead of a notification prompt, you can choose to receive a code via text message or voicemail from Google. In order to choose this method, you’ll click on “Show more options” and select “Text message or voice call”:
On the next page, enter your phone number where you will receive the verification codes and select whether you want to receive them via text message or phone call:
On the next page, you will need to enter in the unique code that Google sent you (either via a phone call or text message, depending on which one you chose):
Hit “Next” and then review the following page before clicking on “Turn On”:
Once you click “Turn On”, you’re all set!
(Option 3): You might wish to take additional security measures with the use of a Security Key. To use this method, select it after clicking on “Show More Options”:

This will take you to a page where you will be able to set up a range of advanced 2-step verification options, including physical keys such as fingerprints:
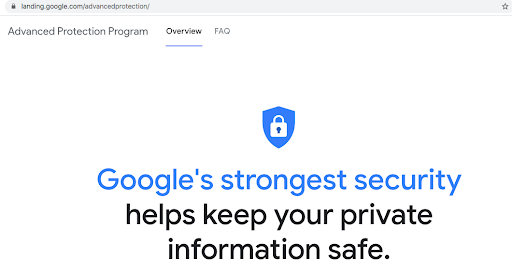
This requires much more work than the traditional text message, voice call, or notification 2-step verification options. Most people will not need this next level of security, but some people do.
If this advanced security is necessary for your protection, then it is best to consult with your IT professionals and Google’s representatives to find the best security key for you.
Why is Gmail Two-Step Verification So Important?
It’s shockingly easy for someone to gain access to your Gmail password. You could be using the password on more than one site, for instance. Or you might download a malicious program from the internet that gives hackers access to your keystrokes.
Just imagine going to log in to your Gmail account and discovering that you are locked out because someone stole your credentials and now has access to all of your information. This could be proprietary business information, personal health data, or even access to your savings accounts.
Two-step verification helps reduce your risk of cyber attacks on your data. If someone steals your password, they would still need to have access to your physical device (phone) to receive a code and login. This prevents them from stealing your identity, deleting your documents, or otherwise wreaking havoc on your life. Thats why it’s important to regularly change your Gmail password
How to sign in with 2-Step Verification
2-Step Verification takes several steps, but it shouldn’t be too difficult to set up once you get the hang of it.
There are three main options for implementing 2-Step Verification: Google Authenticator, Code-based, or SMS (text message) codes. Each has its pros and cons.
The first is the most straightforward option which is Google Authenticator. It uses an app to generate verification codes, then sends them to your phone via push notification.
It’s probably the most secure option because it’s unlikely for hackers to access your phone and get the codes.
Code-based 2-Step Verification requires you to enter your password on the website every time you log in from a new device. And SMS 2-Step Verification requires you to receive a text from Google with a verification code every time you log in from a new device.
Other forms of Gmail 2-Step Verification
Google needs to verify that you’re who you say you are when you log into Gmail, Google Search, and other Google services.
Google’s 2-step verification for email is a huge security feature, but it isn’t limited to just logging in on trusted devices like your phone or computer. There are several other ways to verify your identity that don’t require a device and can be entirely done with an app or key fob. Here they are:
Backup codes
Google will give users a list of six backup codes to store offline. These are the only way that someone other than yourself could sign in. You can use Each code only once, so it’s game over until you get a new set if you lose them all.
Google Authenticator app
This free app allows confirmation of your identity by using either a unique one-time password generated by Google. Alternatively, a 6-digit PIN can appear on your Android device paired with your account.
Security keys
Using Bluetooth, location data, and time-based verification, the Pixel 6 can authenticate accounts requiring 2-step verification. You don’t have to be connected to a trusted device.
How to Turn Off Gmail 2-Step Verification on Desktops
1. Open your Google Account page
2. Select Security in Account Settings to enable two-step verification, then click Enable next to Two-Step Verification. You may be prompted to sign in again.
3. Select Turn off. You’ll be prompted to confirm your choice.
How to Turn Off 2-Step Verification in Gmail on Android
1. First, Open Settings on your mobile app, then Google Account. Inside, select Security.
2. You’ll see a “2-Step Verification” section that may prompt you to re-enter your password. You’ll also notice a button labeled “Turn off,” and you’ll need to confirm your choice by tapping it.
3. Once you complete, go ahead and delete your backup codes. They won’t be necessary anymore because of your new security setup.
Turning Off 2-Step Verification in Gmail on Apple (iOS) Devices (iPhone and iPad)
1. Click the menu icon and then head to Settings. Then tap your account, then Manage Google account. Note that if you don’t have a Gmail account yet, you can instead head to this webpage on your device’s browser.
2. To set up 2-Step Verification, tap Security > Signing into Google > 2-Step Verification. There’s a prompt to sign in.
3. Tap Turn off; Then confirm your choice.
4. Do not reuse an old password or any backup codes you used previously to ensure your privacy.
Gmail 2 Step Verification Frequently Asked Questions (FAQs)
Why did I get a Google verification code I didn’t request?
If you receive a Google verification code, it means that someone attempted to login to your account. It could have been an accident, but it could also mean that someone purposely attempted to access your account.
Can you bypass 2-step verification Gmail?
In some cases, it is possible for you to bypass 2-step verification. It requires factory resetting your device and is not recommended unless it is a last resort.
What happens to 2-step verification if I lost my phone?
If you lost your primary phone used for 2-step verification you still have a few other options to sign in to your account:
- A secondary phone signed into your account.
- A backup phone number you specified previously for 2-step verification in your Google account.
- A code you saved to be used in the event of losing your phone.
- A security key that you created for 2-step verification in your Google account.
Situations when you receive a verification code?
If you have 2-step verification enabled, then you will receive a verification code anytime you log out and try to log back in. If you sign into your Google account from a new device, you will sometimes receive a verification code as well.
How many digits are in the Google verification code?
The google verification codes are 6 digits. They are delivered to your phone either via a phone call or SMS text message.
Conclusion
Security is of the utmost importance today. Recent high profile security breaches have proven that even governments and businesses with large budgets are vulnerable to cyber crime. A password could fall into the wrong hands — whether someone hacks your phone, recovers passwords from an old computer, or accesses your passwords by other means.
In order to stay protected in a digital age, you need to take security into your own hands. Luckily, Google makes it easy to have peace of mind with their Gmail 2-step verification methods. Most people will have plenty of protection with notifications, phone calls, or text messages. And for those who need advanced security, there are plenty of options for that as well.
Track emails, email reminders & templates in Gmail for free
Upgrade Gmail with the features it’s missing
Add to GmailDavid Campbell
David Campbell is the editor of the Right Inbox blog. He is passionate about email productivity and getting more done in less time.