Released in 2004, Gmail was initially thought to be another of Google’s elaborate April Fools’ jokes. This was on account of its 1GB of storage space – much higher than any other email provider at the time.
While storage capacity was one of Gmail’s most attractive USPs, it soon became apparent that it could offer much more than other email services.
Since then, Gmail Labels have become one of its most-loved features.
What Are Gmail Labels?
Most email providers use a standard folder and subfolder format to organize users’ messages. Google does things differently. Users have much more control over their inbox, thanks to Google’s innovative approach and the introduction of categories and labels. This feature made Gmail very powerful.
Reasons to Use Gmail Labels
There are many advantages to using Gmail labels:
1. It helps productivity – applying labels to a lot of your emails makes it easier to find them in the future, which helps save you time and boost your productivity.
2. It keeps your inbox organized – as Gmail uses labels rather than the usual folder-based system that you see in other email clients, it allows for more flexibility. With labels, you can have emails that can live in more than one place. Think of labels a bit like tags. It’s much more efficient than folders.
3. It makes for a more attractive inbox – using colors on labels not only makes your inbox look a lot nicer; it also makes it easier to scan through.
How Do I Create Gmail Labels?
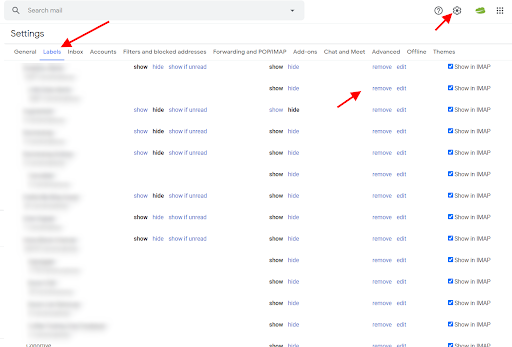
1. Go to Gmail settings and choose Settings.
2. Choose the Labels tab.

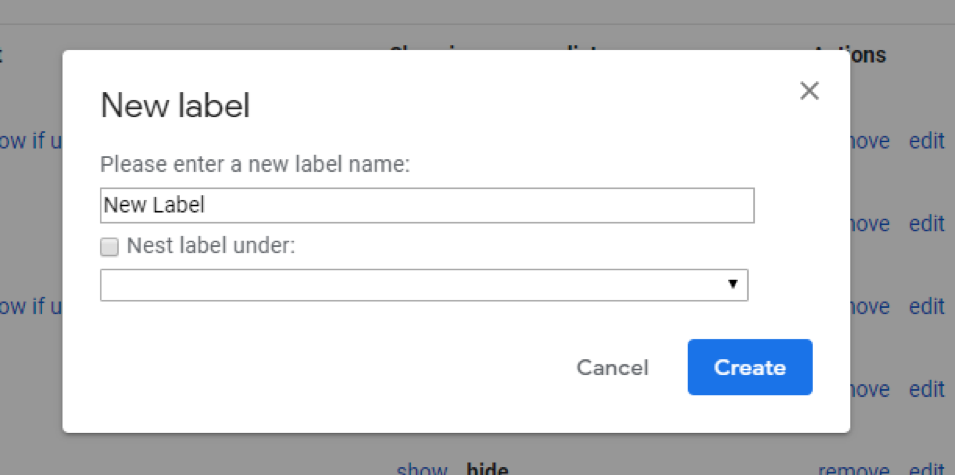
3. Create a new label that defines the content of the emails you are categorizing (think clients or specific projects).
4. Create a filter from the Filters tab.
5. Create the new filter and then apply it to all matching conversations.
By adding labels and using filters, Gmail will automatically apply the label to both old conversations that match your criteria, and any future emails that arrive in your inbox.
How Do You Delete a Gmail Label?
After you’ve been using Gmail labels for some time, there may be old labels that become redundant or superfluous to your needs, so spring cleaning is highly recommended.
To clean out old labels, simply navigate to the labels tab within Gmail settings. You can get rid of the clutter and keep things nice and tidy.
Organizing Your Gmail Labels
Labels in Gmail allow for an almost-infinite number of customizations. Here are a few ways that you can utilize them to help you achieve that elusive Inbox Zero.
1. Renaming and Removing Gmail Labels
To rename labels, follow these steps:
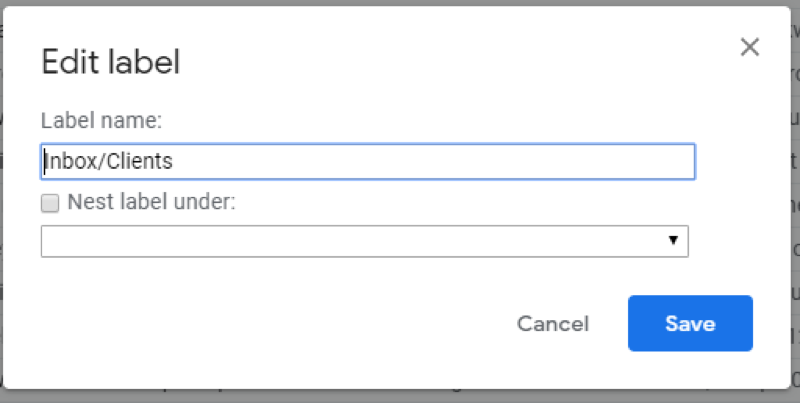
Step 1. Click on the arrow next to the label you need to rename.
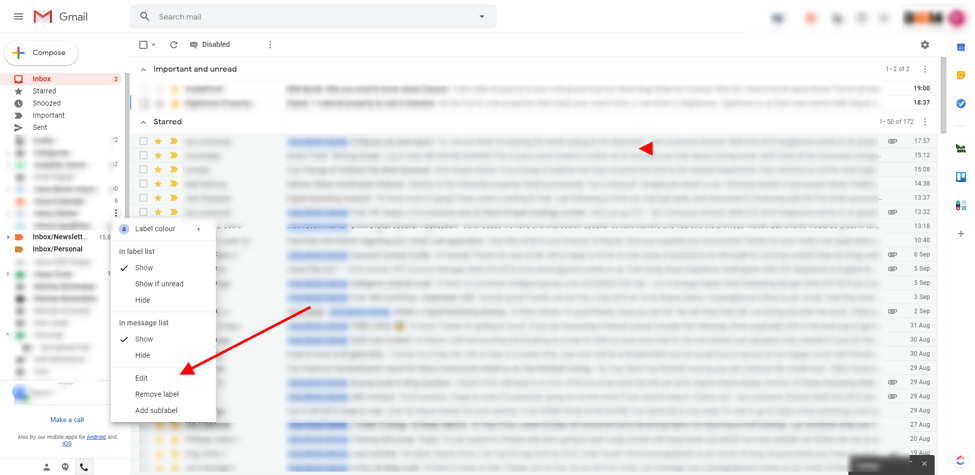
Step 2. Click Edit to edit the name of the label from the pop-up.
Removing Gmail Labels
To remove Gmail labels, do the following.
Step 1. Open an email that has the label you need to remove.
Step 2. Click on the tag icon.
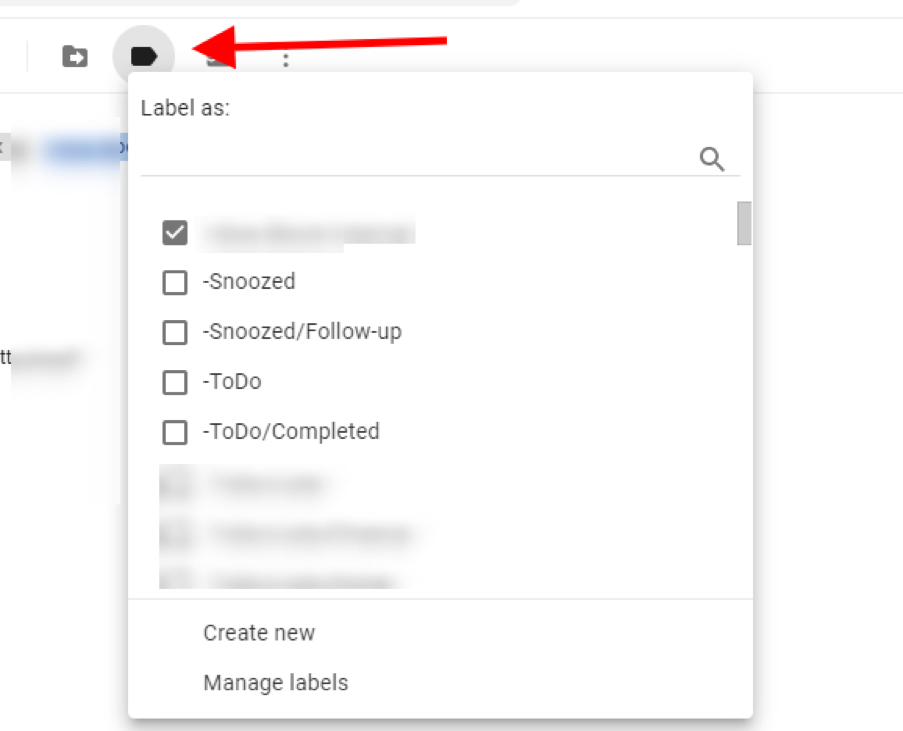
Step 3. Uncheck the label you need to remove.
Alternatively, just click the “x” on the label that you want to remove, which is much faster.

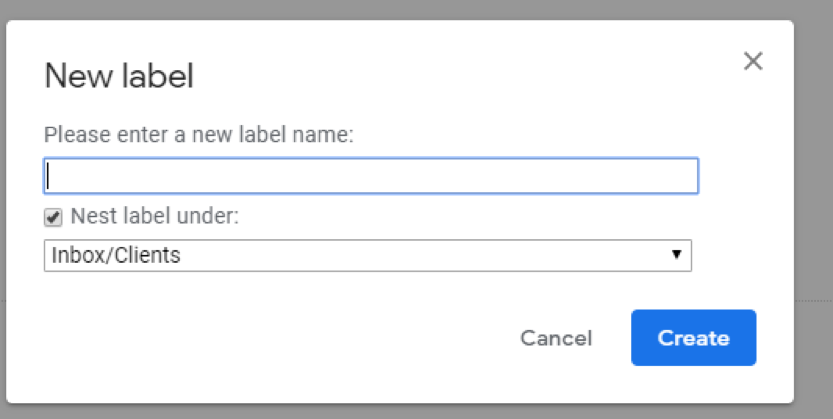
4. Nested Labels in Gmail
Nested labels are sub-labels that live underneath a parent label. This allows you to create very granular labeling. For example, you may want to create a label for all your internal emails and then add a nested label for each of your team members.
Step 1. Click on the arrow near the label that requires a new nested label.
Step 2. Click on Add Sub-label.
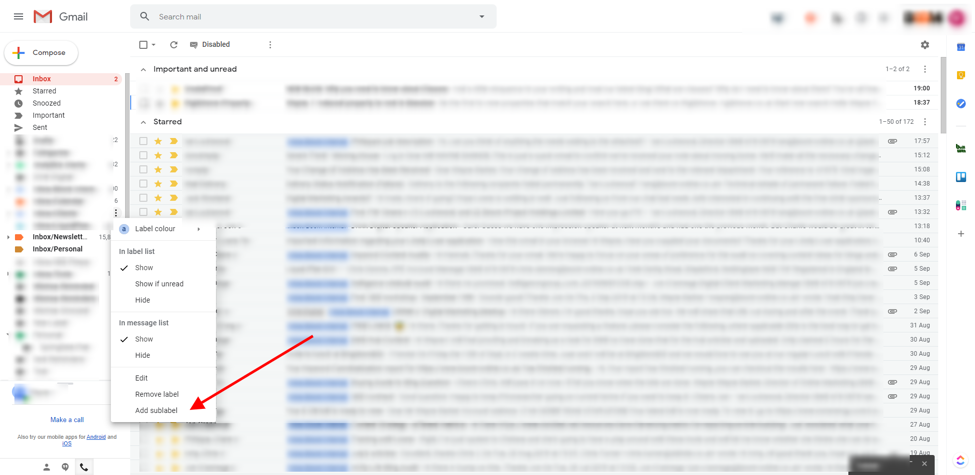
Step 3. Create your new sub-label from the pop-up menu.
5. Color-coding Gmail Labels
One of the most powerful visual aids in Gmail Labels is the ability to add color-coding. This allows you to quickly scan your inbox for your most-used labels.
Here’s how to do it:
Step 1. Click on the arrow of the label.
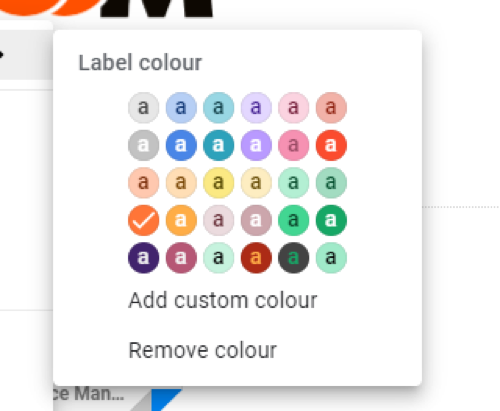
Step 2. Choose Label Color from the menu.
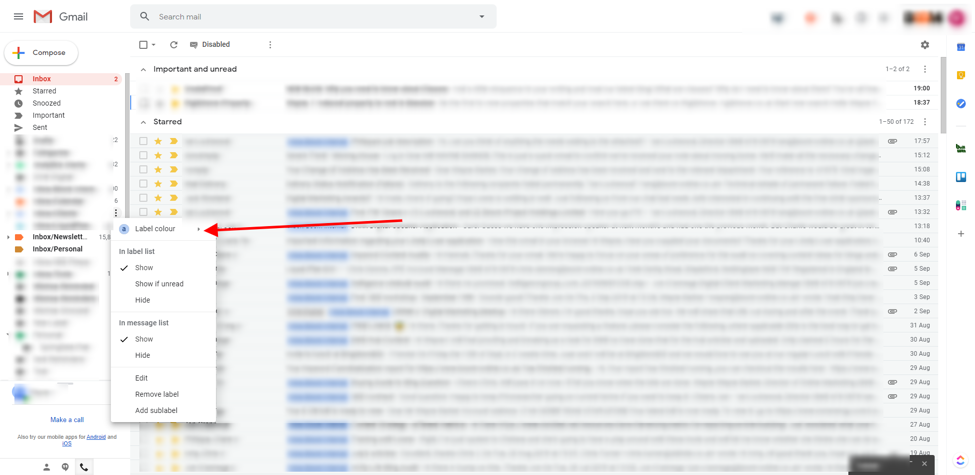
Step 3. Choose whichever color you prefer.
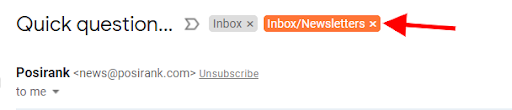
How Do You Remove a Gmail Label from an Email?
Whether you mistakenly added the wrong label to an email or simply want to recategorize it, removing a Gmail label from an email is also super simple.
Step 1. Open up the email that you need to remove the label from.
Step 2. Look for your label in the email, and then just click the X button. The label will then be removed from that email.
How Do You Merge Gmail Labels?
There are times where you might want to merge your Gmail labels to make it easier to find specific emails. Here’s how to do it.
Step 1. Head over to the search bar and type in “label:nameoflabel1 OR label:nameoflabel2″ (but you’d include your actual label names instead of these placeholders).

Step 2. Simply select all of the emails that appear in the search results.
Step 3. All that is left for you to do now is create a new label for these search results, and you have successfully merged two labels into one new label.
Conclusion
There’s little doubt that Gmail is one of, if not the most, feature-filled email service providers out there. This allows you to be as productive as possible.
Gmail Labels are easy to customize and introduce into your workflow – and as soon as you start using them, you’ll wonder how you ever lived without them.
Track emails, email reminders & templates in Gmail for free
Upgrade Gmail with the features it’s missing
Add to GmailDavid Campbell
David Campbell is the editor of the Right Inbox blog. He is passionate about email productivity and getting more done in less time.