
Email signatures are arguably the best way to let your contacts know more about you, and yet they’re often overlooked. A lot of Gmail users aren’t aware of how to insert a Gmail signature. Fortunately, creating a new signature or changing an existing one to something more attention-getting is easy. And Right Inbox offers additional features that let you get even more out of your email signature in Gmail.
So what should your signature consist of? At minimum, include the following elements:
- Your name, the company you work for, and your job title
- Email address(es) and other contact information
- Links to your social profiles
- Your business logo or a headshot (or both)
Ready to get started? Here’s how you can change your email signature in Gmail.
How to Insert a Signature in Gmail with Right Inbox
Step 1. Sign in to your Gmail account.
Step 2. If you don’t have an account yet, you’ll need to sign up for Right Inbox (basic is free).
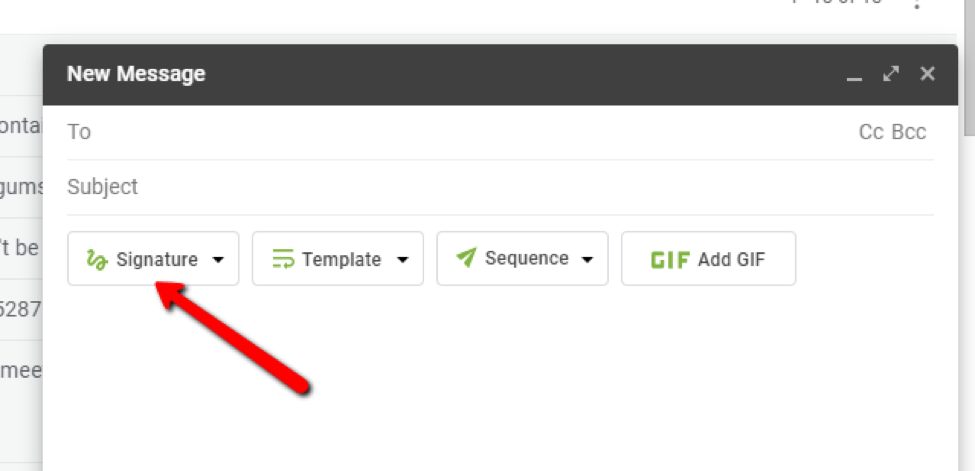
Step 3. Choose the “Signature” option from the toolbar.
Step 4. Name your first signature.
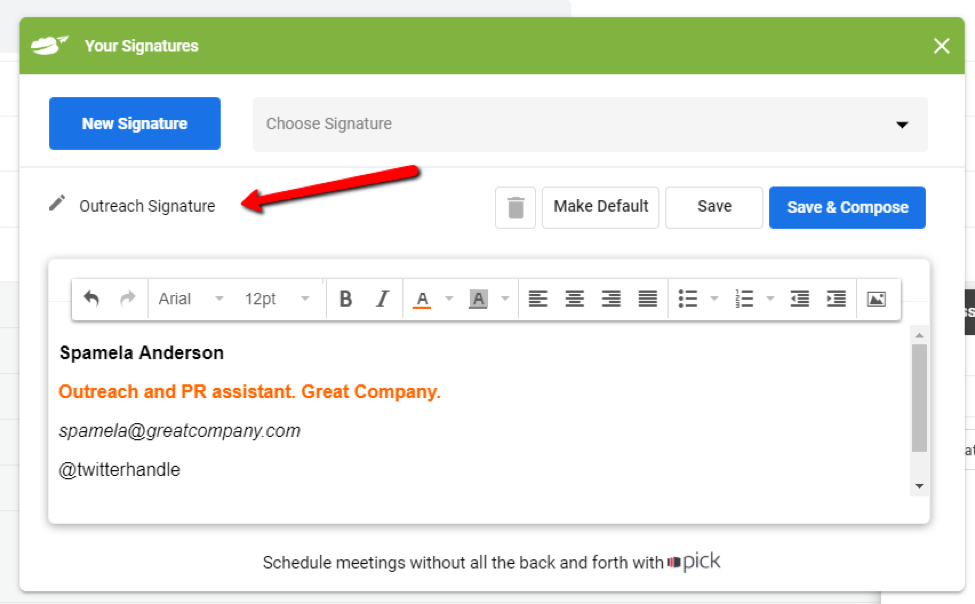
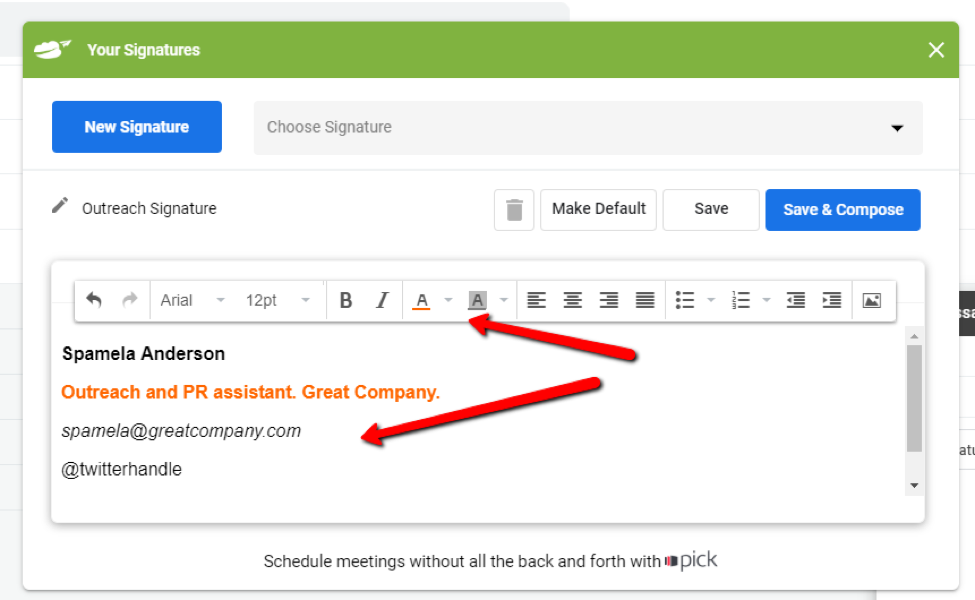
Step 5. Create your new signature using the WYSIWYG editor.
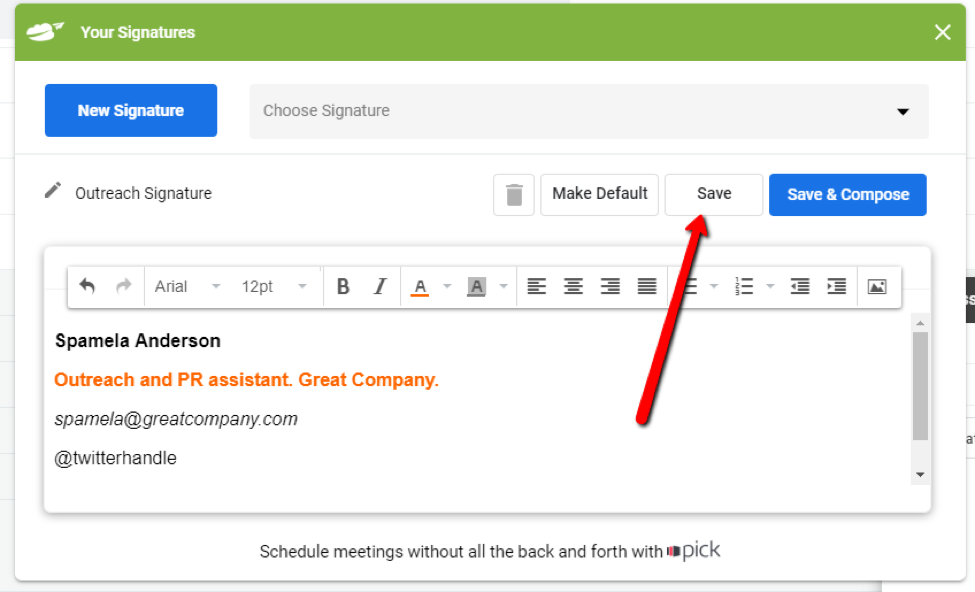
Step 6. Click “Save.”
Step 7. Repeat this step for any other signatures you want to create.
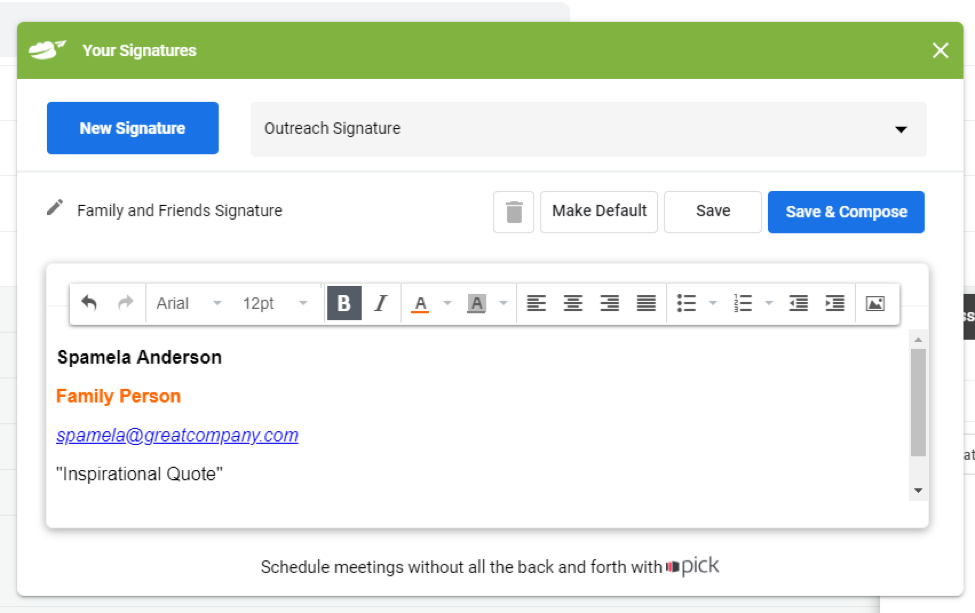
Step 8. When composing an email, a click of the “Signature” button will insert the default signature.
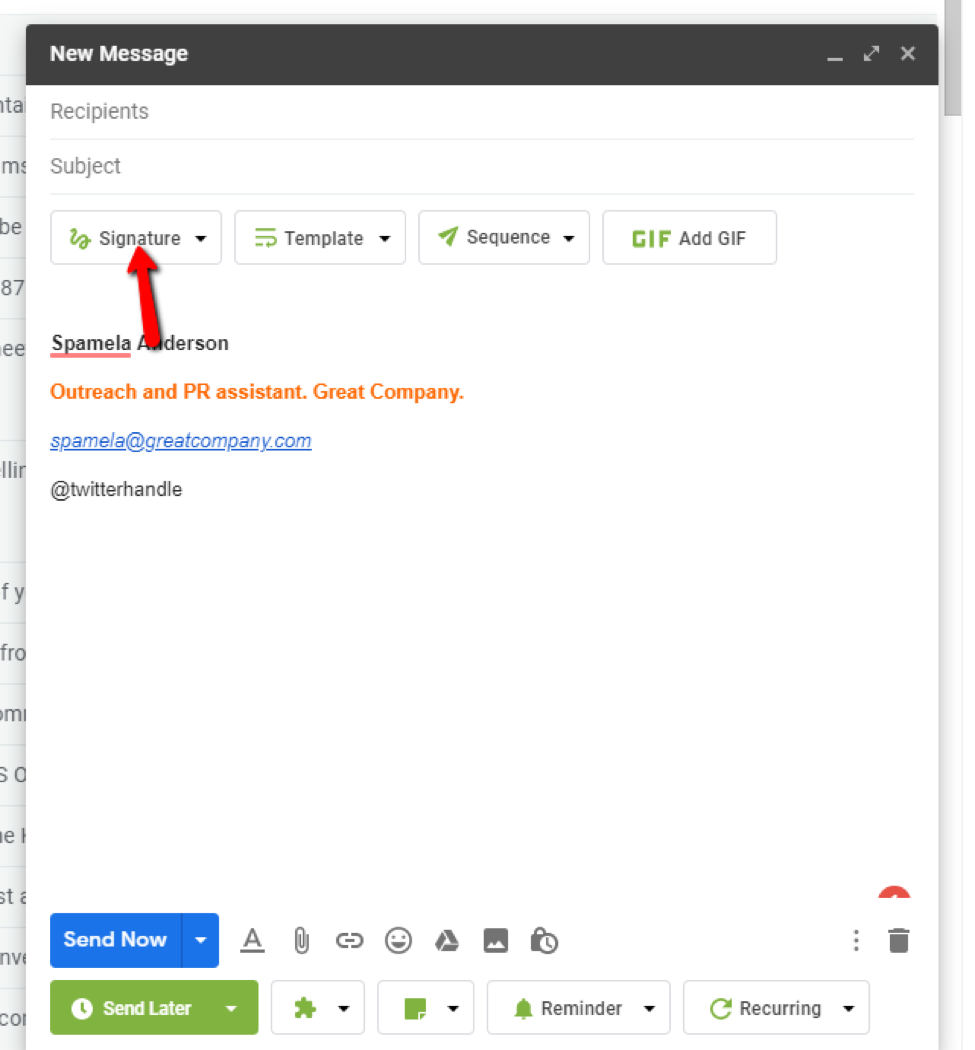
Step 9. If you want to choose another of your pre-saved signatures, simply click the arrow next to the “Signature” button.

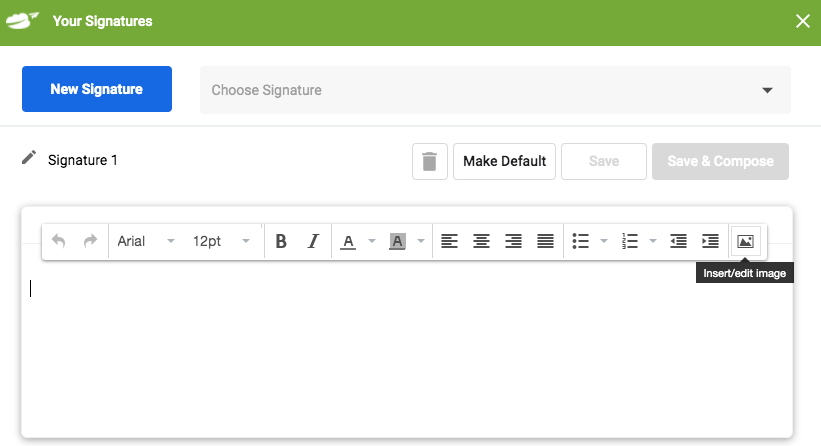
Step 10. To insert an image just click on the ‘insert/edit image’ button as seen in the image below.
How to Insert a Signature in Gmail
Step 1. Sign in to your Gmail account.
Step 2. Go to “Settings” and choose “Settings.” (You’ll need to click “Settings” twice)
Step 3. Choose the “General” tab.
Step 4. Find the “Signature” option.
Step 5. You’re now ready to add your new or changed email signature.

Changing the Appearance of Your Gmail Signature
Adding a picture or logo to your Gmail signature – Choose where you want to add your image by placing the cursor in the desired location. Click “Insert Image” and upload the picture or logo of your choice.
Changing the formatting of your Gmail signature – Select the text you want to change. Go to the WYSIWYG editor and choose the font and signature size. You’ll also be able to add italics, bold, and underlining, and change the color of the text from the editor.
Adding links to your Gmail signature – Highlight the text that you want to turn into a link. In the WYSIWYG editor, select “Link.” Add in the URL that you want the text to link to and click “Save.”
Creating and editing signatures in Gmail is incredibly easy with these simple steps.
When creating your signature, keep the following tips in mind:
- Don’t pack in too much information
- Limit the number of fonts or colors you use
- Keep your images simple
- Use the design hierarchy to guide users to the important information in the signature
- Check how it looks on mobile, tablet, and desktop before setting it live
Additional Reading: How to Add a Gmail Signature
The 5 Benefits Of A Good Email Signature
There are more reasons that we could count for why having a great email signature matters. But let’s focus on the top 5 reasons you should make the most out of this vital email component:
- Professionalism: A great email signature sets you apart from all the other senders in your market. They’ll be able to tell you’ve really thought about your email strategy.
- Promotion: Never miss a chance to link to your other platforms like social media, landing pages, and more. It could lift sales by a wide margin.
- Customer Service: Have some helpful links to answer common questions or direct customers in the right direction? Include them in your signature to eliminate unnecessary back-and-forth emails.
- Efficiency: Related to the note above, it’s much more efficient to provide commonly requested information in your signature than encouraging unnecessary emails. It saves time for you and your recipients.
- Connection: Your email signature is a great place to include some kind of personal messaging. Are you into supporting a specific cause? Do you love dogs? Get more personal with some engaging personality-driven signatures.
How to Troubleshoot Formatting Issues in Gmail
Issue: Text Formatting Cannot Be Added
By and large, the biggest issue with formatting in Gmail is not being able to add text formatting – but how do you fix it?
If you have this issue, there’s a good chance that you may be working in plain text. To fix this, all you have to do is turn off plain text. Here’s how to do it:
Step 1. Open a new message using the Compose button.
Step 2. Navigate to More Options.

Step 3. You should see a check next to the Plain Text Mode – simply remove that.
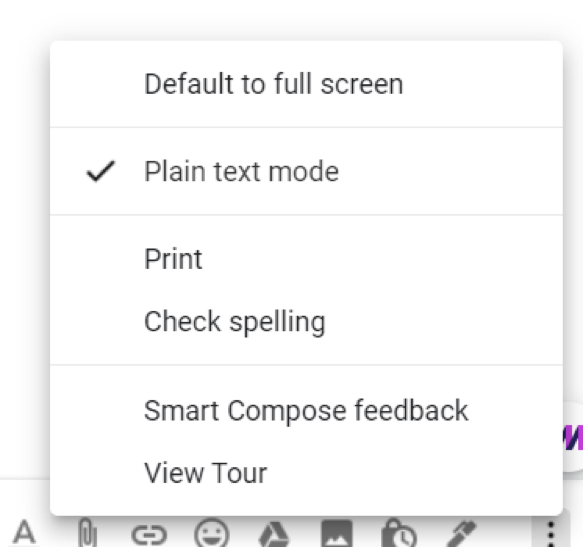
Step 4. That’s it – you’re done.
2 Other Quick Ways to Solve Gmail Formatting Issues
1. Use Ctrl+Shift+V as a shortcut when you’re pasting – this copies the unformatted text.
2. Use the Remove Formatting feature that’s native in Gmail – it’s the little button at the bottom right of the formatting toolbox.
How to Change an Email Signature on an iPhone
Whether you’re using an iPhone or Android phone, your signature is going to be different than the one from your standard Gmail account. Here’s how to change your signature from an iPhone:
Step 1. Start by opening the Gmail app on your iPhone.
Step 2. Choose Menu and then scroll down to Settings.
Step 3. If you have more than one Gmail account, you need to choose which one you want to change at this stage.
Step 4. Pick Signature Settings and then turn on the Mobile Signature setting.

Step 5. Make the desired changes to your signature.
Step 6. By clicking the back arrow, your new signature settings will be saved.
How to Change an Email Signature on an Android Phone
If you own an Android phone, then the following process is very similar to the one mentioned above for an iPhone.
Step 1. Head over to the Gmail app on your phone.
Step 2. Choose Menu and then choose the Settings option.
Step 3. If you have more than one Gmail account, you need to select the one you want to change the signature on.
Step 4. From there, choose Mobile Signature.
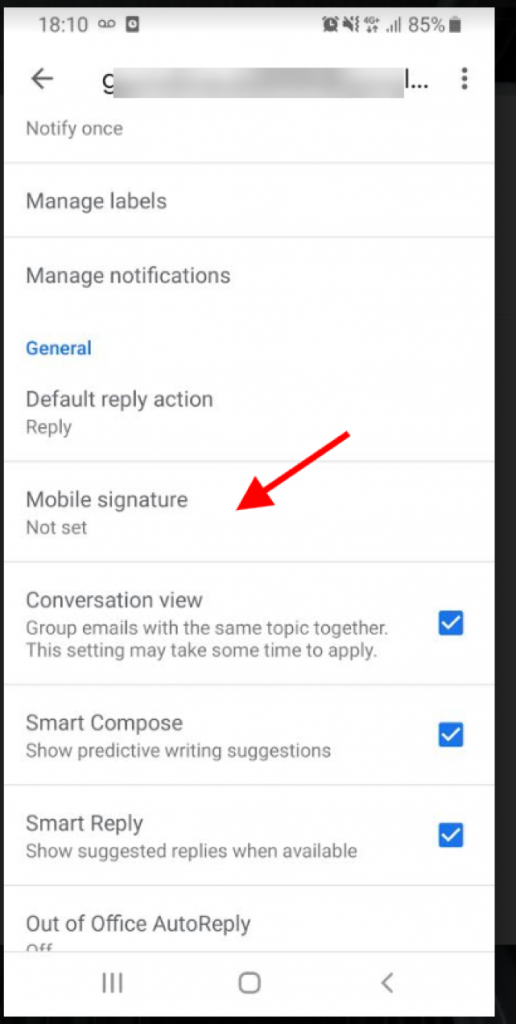
Step 5. This will now allow you to edit the text of your mobile signature.
Step 6. When you have finished editing, simply click OK.
Changing Email Signatures In Gmail — FAQ (Frequently Asked Questions)
Can you change your Gmail email signature?
Yes. Changing your signature is a piece of cake using Right Inbox.
Why would you want to change your Gmail email signature?
You might have a different market segment for each email that you send. Aside from that, you may want to have a different signature for personal and professional use.
What’s the easiest way to make an email signature template for Gmail?
Right Inbox will be your best bet. Using a WYSIWYG editor, you can make all the changes you need to without knowing how to code.
Can you have various email signatures in Gmail?
Yep! Right Inbox also lets you save various signatures so you can avoid reinventing the wheel every time you send a new email!
Track emails, email reminders & templates in Gmail for free
Upgrade Gmail with the features it’s missing
Add to GmailDavid Campbell
David Campbell is the editor of the Right Inbox blog. He is passionate about email productivity and getting more done in less time.