A mail merge is a super useful way of sending personalized mass emails. All you need is your Gmail account, Microsoft Word and Excel (or Google Sheets), and we’ll show you how to do the rest.
What Are Mail Merges?
A mail merge is a quick and easy way to personalize emails, letters, labels, newsletters and any other customizable message you can think of. They let you send out messages en masse that are personalized to each recipient, so you don’t have to manually customize each document yourself.
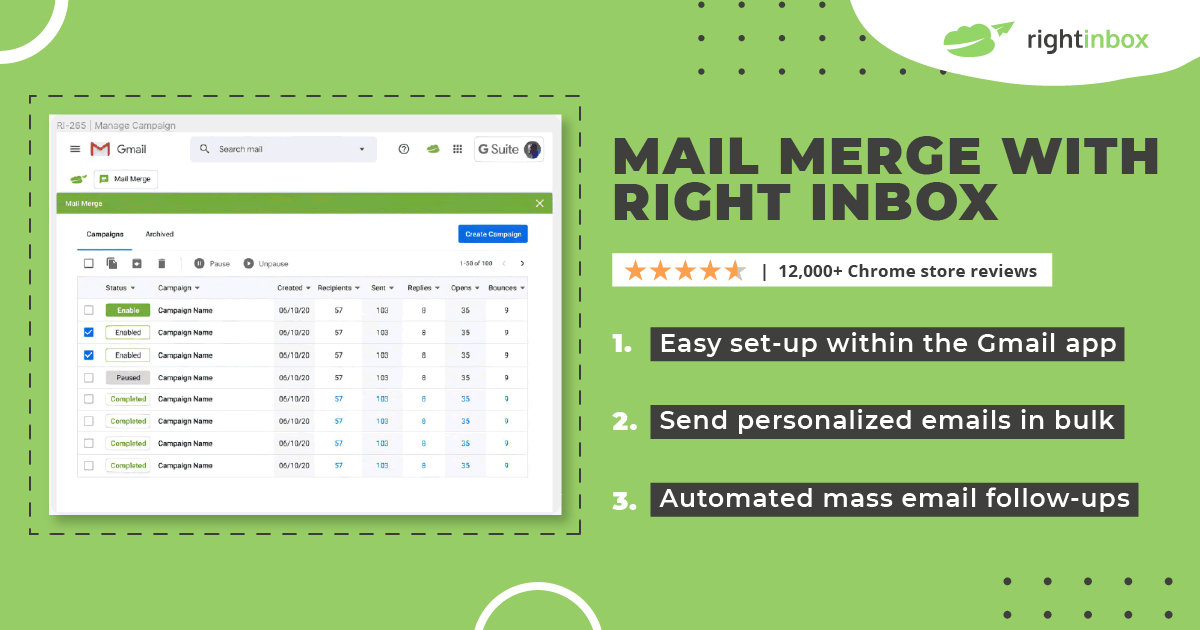
Right Inbox has just recently launched it’s own mail merge feature for Gmail, which makes it super easy to send mail merges within Gmail. Try from the Chrome Store today!
What Can You Use Mail Merges For?
Mail merges are useful when personalizing any kind of message or document. For example:
- Marketing emails
- Envelopes
- Mailing labels
- Newsletters
- Custom catalogs
- Form letters
How to Do a Mail Merge With Word & Excel
The Components of a Mail Merge
The mail merge process consists of two parts:
1. The Template File – the document you’ll be sending out to your recipients. It will contain all the placeholder names which will become the personalized data such as first and last names, addresses, job titles etc. that will be grabbed from your data file (your Excel Spreadsheet).
2. The Data File – the data source (usually a Microsoft Excel Spreadsheet or Google Sheet) containing all the personalized data such as first names, last names, addresses, job titles etc. that will be added to your template file.
The mail merge automatically grabs the personalization data from your data file to your template file.
Step One: Create Your Address List in Microsoft Excel
1. Open Microsoft Excel.
2. Click on Blank workbook.
3. Start entering your address list details into your Excel spreadsheet.
4. Enter column headers in the first row (beginning in cell A1). Note that the column headers must read the same as the placeholder names you want to use in your Word template (e.g. if one of your column headers is “First name” then the field names in your Word template will also be “First name”.
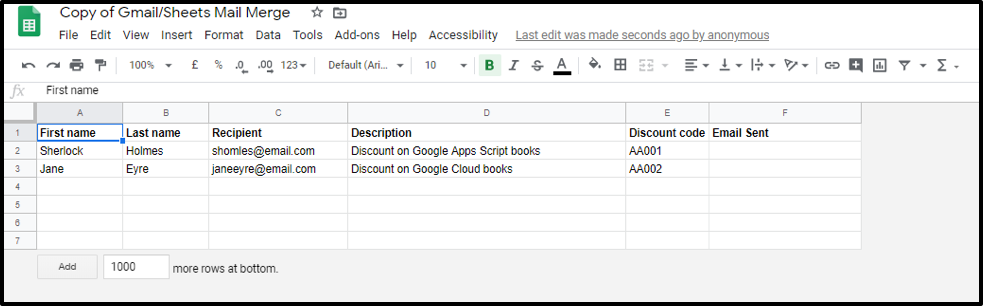
5. Fill in all the contact data, one per row, starting in cell A2.
6. When you’re finished creating your contact sheet, save it by clicking on File – Save As.
Make sure you’ve made all the necessary edits to your Excel Spreadsheet before you start the mail merge process.
Step Two: Create the Document in Microsoft Word
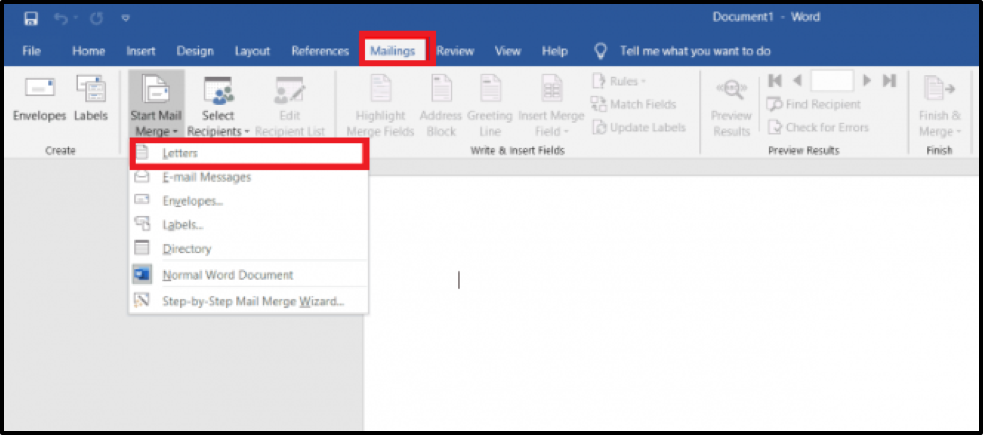
1. Open a new Word document, which will be the main document that will be sent to each recipient in your mail merge.
2. Click on the Mailings tab and click Start Mail Merge.
3. In the drop-down menu, you’ll see all the different mail merge documents available to you.
4. Select the appropriate one (in this case, a Letter mail merge)
5. Write the body of your letter in the Word document.
Step Three: Select Your Recipient List
Now that you have your Excel Spreadsheet and Word Documents set up, you can select the list of recipients you want to receive your letter.
1. In the Mailings tab, clicking on Select Recipients, where a drop-down menu of all your mail merge list sources will appear.
2. Click on Use an existing list, since your contact information is already available as an Excel file.
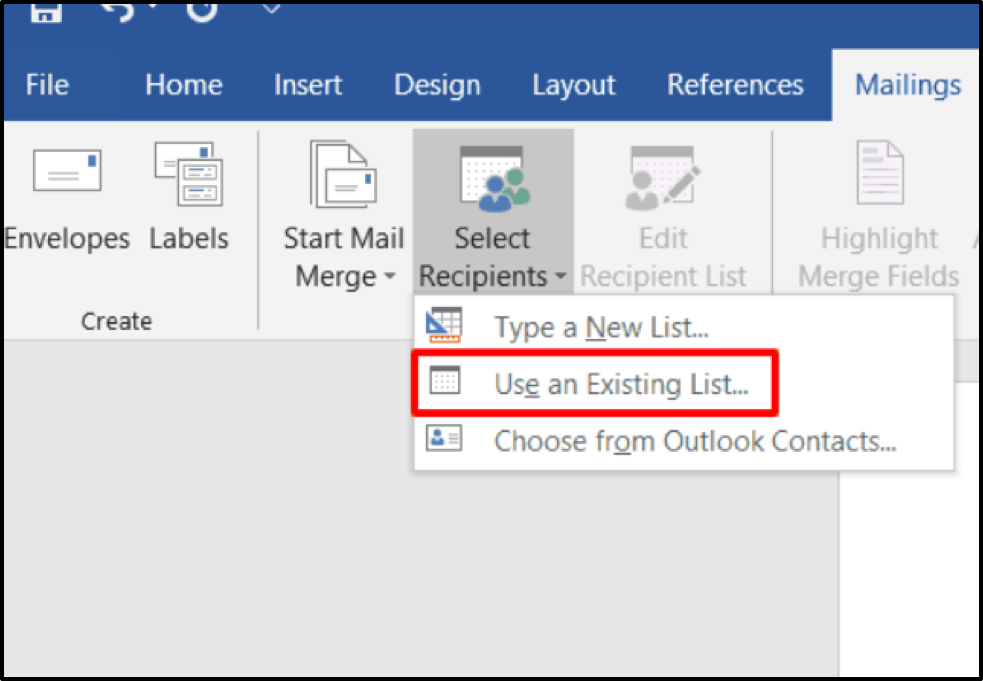
3. A pop-up box will appear, then select the Excel sheet you’ve created, and click Open.
4. In the window named Select Table, choose the Excel worksheet you want to use, and click OK.
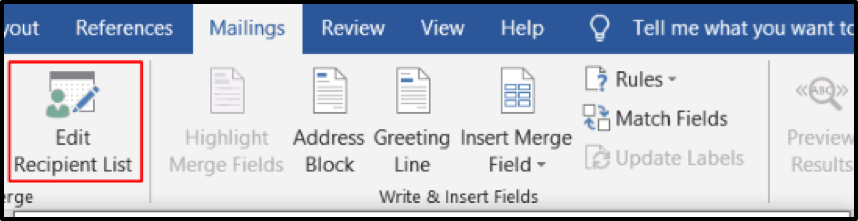
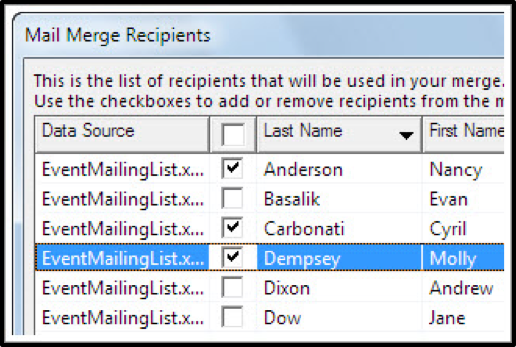
5. In the window named Mail Merge Recipients, uncheck the checkbox of the recipients you don’t want in your mailing list.
Step Four: Add Personalized Messages
You’ll personalize your content in the Word document letter template. Within your Word document, you can personalize three variables:
1. Insert Address Block
2. Insert Greeting Line
3. Insert Merge Field
Insert Address Block – add a recipient’s address to your document.
1. Click on the Address Block in the Write and Insert Fields section.

2. Choose an address block format in the window that appears and click OK.
3. Now an address placeholder («AddressBlock») will automatically appear in your letter.
Insert Greeting Line – include a personalized greeting or salutation in your letter
1. Click on Greeting Line in the Write and Insert Fields section.
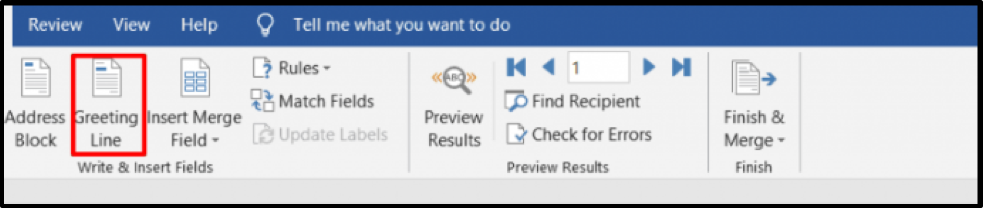
2. In the pop-up window, select the format you wish to use and click OK.
3. A greeting placeholder («GreetingLine») will automatically appear in your document.
Insert Merge field – insert other mail merge fields from your Excel file
Other mail merge fields such as first name, email, company name, job title etc. can be added to your Word template.
1. Click on Insert Merge Field from the Write and Insert Fields group.
2. You’ll see the drop-down menu of some mail merge labels from the column names in your Excel spreadsheet.
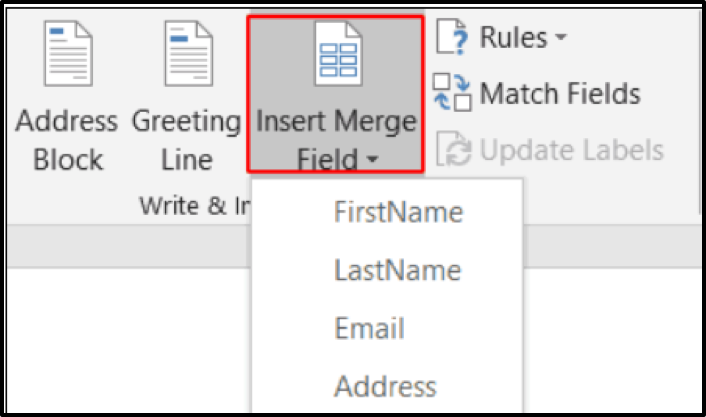
3. Click on the mail merge field or fields you want to include in your letter.
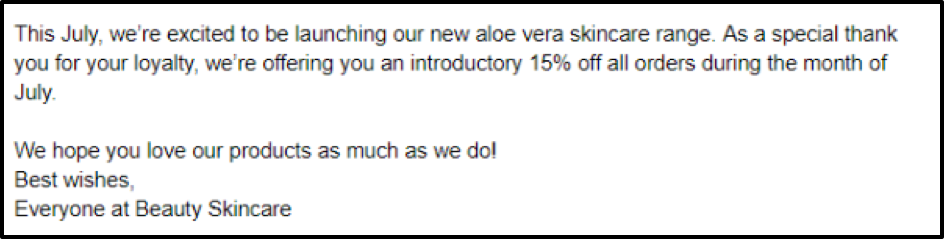
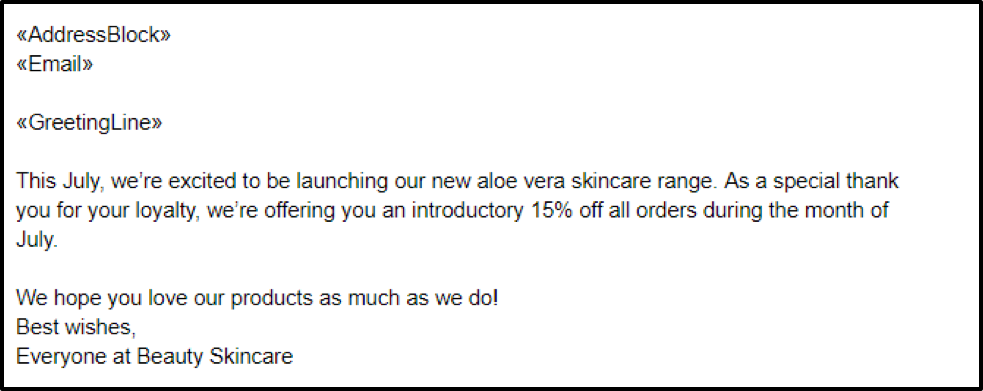
So, now that you’ve personalized your letter, it might look something like this:
Step Five: Preview and Send
Once you’ve personalized your letter, you can preview it (with the data from your Excel worksheet) before you send it out.
1. In the Mailings tab, click on Preview Results.
2. Preview the results for individual recipients by entering the recipient number in the text box (your recipient number is the corresponding row number in your Excel spreadsheet). You can also scroll through your recipients by clicking on the Previous and Next buttons.
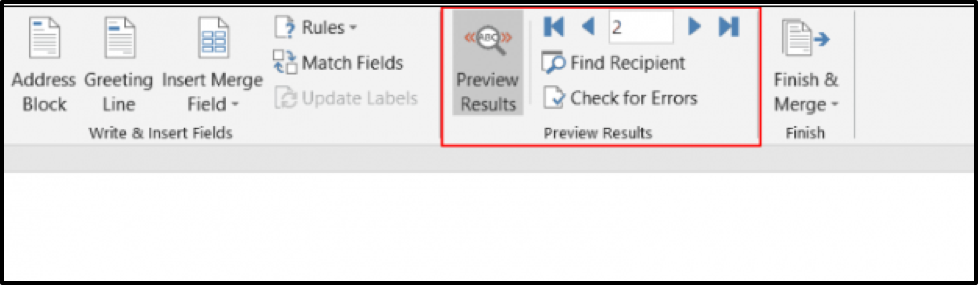
3. Once you’ve finished previewing your letter, click Finish and merge to complete the mail merge process.
4. Here, you’re given the option to:
a. Edit Individual Documents – to edit your letters separately.
b. Print Documents.
c. Send Email Messages, if you want to send letters as emails (in which case you need to set up Outlook or Gmail with Word).
Conclusion
Using Microsoft Excel and Word to carry out a mail merge saves you a huge amount of time and effort if you need to distribute personalized messages en masse.
While at first the process can be a little fiddly (although this step-by-step guide will help you), it’ll become second nature after a couple of campaigns.
The good news is that Right Inbox has it’s very own mail merge feature, which simplifies the process further. Try in the Chrome Store Today
Track emails, email reminders & templates in Gmail for free
Upgrade Gmail with the features it’s missing
Add to GmailDavid Campbell
David Campbell is the editor of the Right Inbox blog. He is passionate about email productivity and getting more done in less time.