Most people are overwhelmed with emails every day, but there are ways to make your inbox more manageable.
One way is with Gmail Categories. By default, Google has categories for Primary, Updates, Forums, Promotions, and Social, but those might not be the best options for everyone.
Here’s how to add and remove categories across your desktop and any other devices that you may use to access your emails.
Adding and Removing Gmail Categories on Desktop
Step 1. Make sure you are logged into your Gmail account.
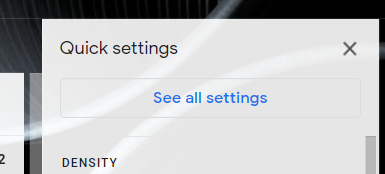
Step 2. Head over to the Settings section of Gmail in the top right-hand corner.
Step 3. Click See all Settings. That will take you to the Settings tab.
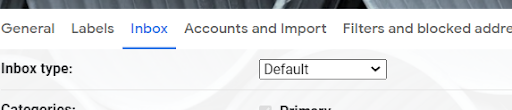
Step 4. From there, select Inbox. That will give you a ton of options like in the image below.
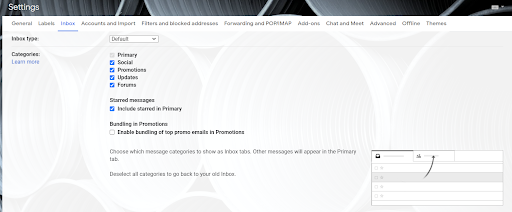
Step 5. You should now see that the Inbox type is set to default.
Step 6. Primary is set by default – you can’t uncheck that one. The other categories, however, can be changed.
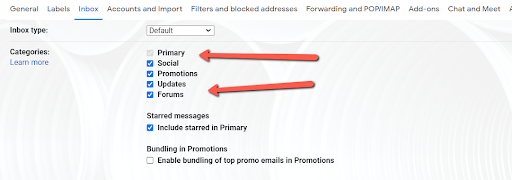
Step 7. Click the checkboxes of the categories that you want to include. You can also choose to have starred messages in your Primary category and bundle top promo emails.
Step 8. Scroll down to the bottom and click Save Changes, and you’re done.
A quick caveat – if you have more than 250,000 emails in your inbox, you won’t be able to turn on your inbox categories.
Adding and Removing Gmail Categories on an Android Device
Step 1. Open up your Gmail app.
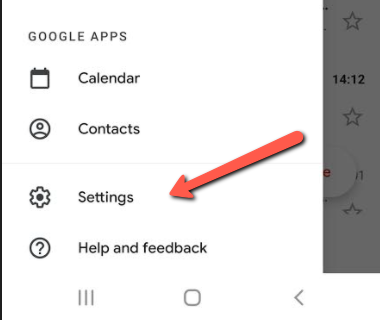
Step 2. Head over to the Menu option in the top left.
Step 3. Choose Settings.
Step 4. Pick the account that you want to change categories on.
Step 5. Make sure Inbox type is set to Default Inbox.
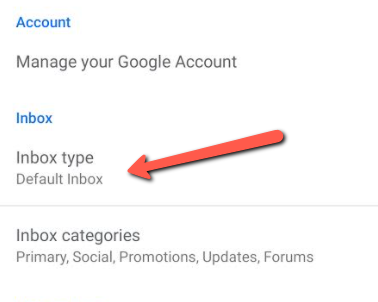
Step 6. Then, select Inbox categories. You’ll now be able to add or remove the categories that you want to see.
Adding and Removing Gmail Categories on iPhone or iPad
Step 1. Open up your Gmail app on your device.
Step 2. In the top left, choose Menu and then Settings.
Step 3. Pick the account that you need.
Step 4. Scroll down, then make sure Inbox type is set to Default Inbox.
Step 5. Then, select Inbox categories.
Step 6. You can now add or remove the categories that you need.
How to Check the Number of Emails in Your Inbox
Step 1. Open up Gmail on your desktop – this feature is only available on your desktop at the moment.
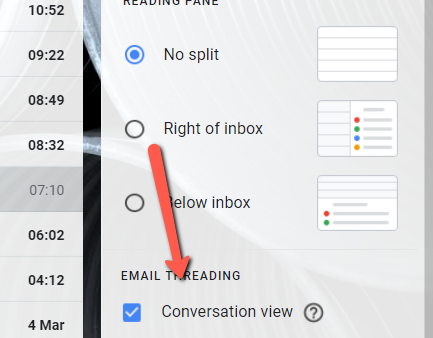
Step 2. Click Settings, then scroll to Conversation View. Turn that off and click Save Changes.
Step 3. When you return to your inbox, you should see the number of messages you have in each category.

Step 4. When you’re done, just go back to Conversation View and turn it back on.
How To Use Gmail Categories – Frequently Asked Questions (FAQ)
What categories does Gmail have?
There are several categories in gmail. Different categories are separated by tabs like Updates, Forums, Social, and Promotions.
What are labels vs. categories in Gmail?
Labels are for marking and organizing certain emails that you receive. You can customize labels. Categories are predetermined and you cannot add or customize them.
How many categories does Gmail let you have?
You can have five categories in Inbox. You have the ability to remove stock categories, but not create or add new ones.
Can I stop emails from going to categories?
The Inbox Type setting in your Gmail will let you remove categories. That way, emails go to other categories or your inbox.
Track emails, email reminders & templates in Gmail for free
Upgrade Gmail with the features it’s missing
Add to GmailDavid Campbell
David Campbell is the editor of the Right Inbox blog. He is passionate about email productivity and getting more done in less time.