Google Slides is a powerful presentation tool that offers many features and options for users. In this article, we will discuss 12 Google Slides features that you may not be aware of as well as some tips and tricks to make the most of this app.
These Google Slides features include importing and exporting documents, adding animations, sharing presentations, using slides as a template, and Google Drive integration.
What is Google Slides?
Google Slides is presentation software that offers users a variety of features to make creating and presenting presentations easier than ever. With Google Slides, you can create slideshows in your web browser without having to install any software.
Additionally, Google Slides offers collaboration tools so that multiple people can work on presentations at the same time, as well as online editing capabilities so you can continue working on your presentation even if you’re not near a computer.
How to Collaborate in Real-Time with Google Slides
When it comes to creating professional presentations, nothing beats the convenience and flexibility of Google Slides. With its real-time collaboration features, you can easily work with other people on your team to create stunning slideshows that will wow your audience.
Whether you’re giving a presentation at work or school, or just need to put together a few slides for an upcoming meeting, this feature makes it easy to get the job done.
How to Share your Presentation
How many times have you had to email presentations back and forth to get everyone on the same page? With a web-based tool like Google Slides, this process is streamlined and much easier.
You can share your presentation with your team directly from Google Slides, and they will be able to view or edit it online.
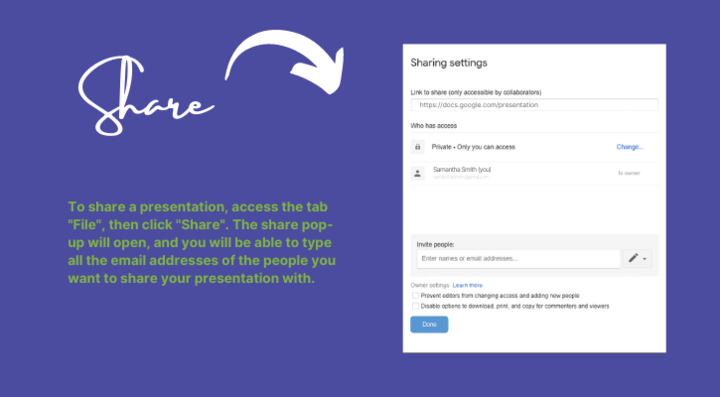
To share a presentation, find the “File” tab then click “Share”. The share pop-up will open, and you will be able to type all the email addresses of the people you want to share your presentation with.
No need to Save Files
Google Slides has an auto-save function so it saves all the changes that you make on your presentation immediately.
Personalize your Google Slides
There are many ways to make your Google Slides presentation look and feel the way you want. You can add features from the Add-ons menu, which is located at the top of your screen. The G Suite Marketplace will open, displaying all of the available add-ons.
Choose the ones that will make your slides more dynamic and fit the purpose of your presentation.
Additional Reading: What is Google Workspace?
Google Slides Features – Top 12 You Need to Know About
1. Create the Master Slide
A master slide is a great way to create a consistent look and feel for your presentation.
To create one, go to File > New > Presentation, then select the “blank presentation” template. Once you have created your slides, you can format them to match the rest of your presentation. This will include things like font style and size, as well as background color or image.
You can also add elements like headers and footers that will appear on every slide in your presentation.
2. Add a theme to the Master slide
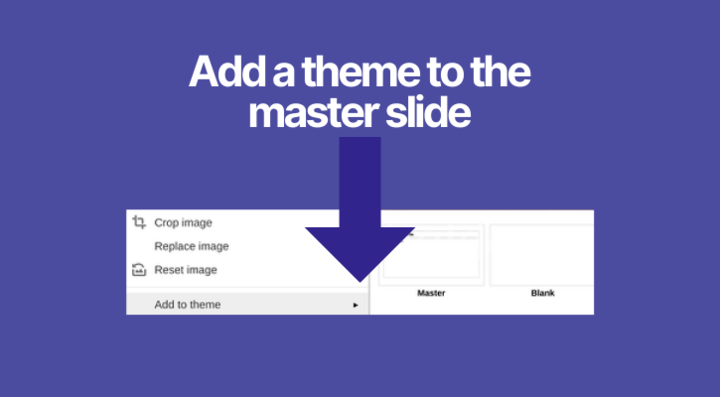
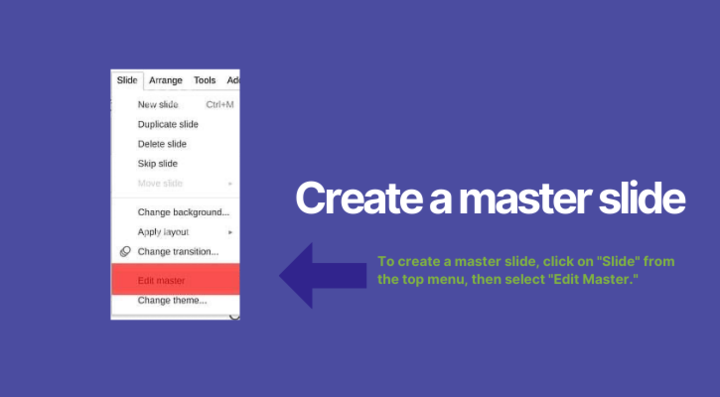
Adding a theme to the Master slide is another way to change the look of your slides. To do this, find any text or image on any slide, right-click it, and select “Add to Master.” This will apply the style of the text or the placement of the image to every slide in your document.
3. Create a template for sharing
Once you have a master slide, you can use it as the basis for all of your other slides in the presentation. To add it as a shared template, go to Google Drive and select the arrow next to Google Slides then select “From A Template.” From here, select “Submit Template.”
Finally, go through your presentations and add the one you want to submit.
4. Edit your slides
When creating or editing slides, it’s important to keep in mind how they will be viewed by your audience.
Try to use simple fonts and avoid too much text on each slide. If possible, break up information into multiple slides instead of cramming everything onto one slide.
Also, be sure to use images or diagrams whenever possible to help illustrate your points. This is especially helpful when presenting data or statistics.
5. Link your slides
Another handy feature of Google Slides is to link slides. Copying and pasting an entire slide from another presentation is helpful but if that slide gets changed, it’s not updated in yours. Linking slides ensure that any changes carry over automatically
6. Import your Microsoft Powerpoint presentations
You can import a PowerPoint presentation to Google Slides by selecting “File” and “Import slides,” and then click the “Upload” tab.
7. Import your Keynote presentations
Importing slides from Keynote into PowerPoint can be a great way to keep your presentations consistent across different software. The easiest way to do this is by saving your Keynote presentation as a PowerPoint presentation and then importing it into Google Slides.
8. Insert YouTube videos
One of the most useful Google Slides features is its ability to insert content from external video hosting platforms, such as YouTube. If you’re doing a live stream, this is one way to keep your audience engaged and entertained. To add a video to Google Slides, click “Insert” in the top menu and select “Video.” You can also upload a video file from your computer.
9. Edit your videos
Although Google Slides is not a video editing suite, it has one important feature that comes in handy when creating a presentation — trimming videos.
If you need to speed up video playback or want to use a shorter clip for your presentation, you can easily trim the video’s length by adding the start and end times. No need to save as the changes are automatic.
10. Autoplay videos
To autoplay videos when presenting, right-click the video and select Video Options. When the menu appears, select Autoplay when Presenting.
11. Autoplay slides
Slide autoplay is a great feature to have when using Google Slides for digital signage. It ensures that your presentation progresses smoothly and automatically. To enable this feature, simply publish your presentation to the web (from the top menu “File” and “Publish to the web”) and change the Auto-advance slides setting to your desired time before you publish.
12. Host a Q&A
Hosting a Q&A is a great way to get feedback. You could create a digital sign asking people trivia questions and providing a link to the answer. To enable Q&A, go into Present mode by selecting “View” from the top menu and then “Present”.
Track emails, email reminders & templates in Gmail for free
Upgrade Gmail with the features it’s missing
Add to GmailDavid Campbell
David Campbell is the editor of the Right Inbox blog. He is passionate about email productivity and getting more done in less time.