
A recent survey found that people receive around 60 to 200 emails a week. Out of these, only 10% are important — the rest is just clutter.
As you can imagine, this is not only overwhelming to look at but can also lead to more serious consequences like missing important emails and reminders.
If you find it difficult to keep your emails in order, worry not! Your Gmail account has a handy feature called rules that can be used to filter and sort your inbox automatically.
Below is a guide to creating rules in Gmail, as well as other handy tips to keep your inbox organized. Let’s have a look.
How to create rules in Gmail?
You can either create Gmail rules from scratch or from existing emails. We’ve described both processes step-by-step below:
From Scratch
Step 1: Open your web browser and log into your Gmail account.
Step 2: At the search bar at the top of the page, click on “Show search options”. It is the icon at the right side of the search bar.
Step 3: Choose one or more options from the search criteria. Click on “Search” to see what comes up.
Step 4: If these are the emails you want to filter out, click on the search bar again.
Step 5: Click on the “Create filter” option at the bottom of the window.
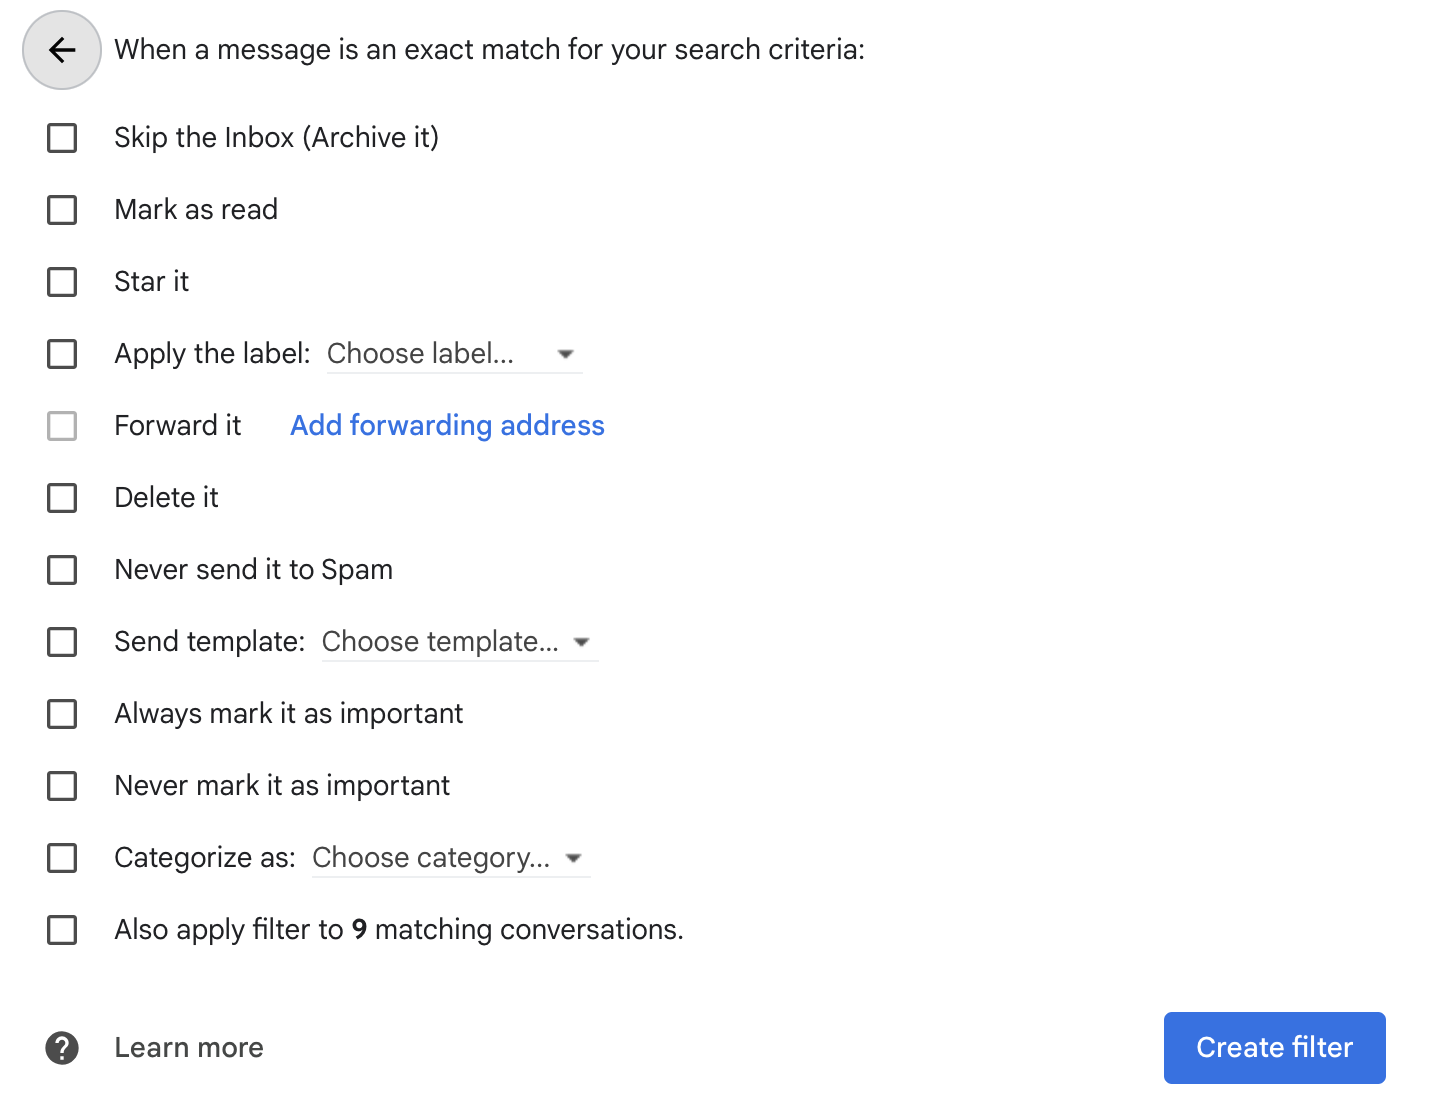
Step 6:. Choose the type of filter you want to apply. For example, if you selected “includes emojis” in the search criteria, you can then choose the “skip the inbox (archive it)” option as the filter. This means that every email you receive containing an emoji will automatically be archived. Here are the options you have:
Step 7: Finally, click on “Create filter”. You’ve now created a Gmail rule from scratch.
From Existing Emails
You can also create rules directly from emails already in your inbox. To do that:
Step 1: Open your Gmail account on your web browser.
Step 2: Select all emails (using the checkbox) that fit the criteria for the rule you are creating.
Step 3: Next, find the “More” button with the three vertical dots under the search bar.
Step 4: Click on “Filter messages like these”.
Step 5: Next, click on “Create filter”.
Step 6: Choose the behavior you want to apply to the rule (for example, Skip the inbox, Mark as Read, Delete, and so on).
Step 7: Click on “Create Filter”. And you’re done.
Additional Notes:
- If you’re choosing to forward certain emails, only new emails will be affected by the rule.
Tips to Manage Gmail Rules in 2024
Creating Gmail rules isn’t the last step to organizing your inbox. Once you’ve set up rules, you’ll need to manage them.
In case you wish to update, delete, or review the active rules in your inbox, follow the steps below.
- Open Gmail in your web browser.
- Click on the “Settings” button (gear icon) in the right-hand corner.
- Then, select “Settings” from the drop-down menu
- In the settings window, select “Filters and Blocked Addresses.”
- To see your active filters, look at the list under “The following filters are applied to all incoming mail.”
- Next to each rule, there are “Delete” and “Edit” buttons. You can use these to update the rules as you wish.
- The changes will be automatically saved and applied to all future incoming emails.
Other tips to keep your inbox Organized
While rules are a great way to sort out your inbox, Gmail also has plenty of other features to keep your inbox organized. If you’d like to go all the way, here are six other ways to have a clutter-free inbox.
1. Set Aliases
Gmail allows you to filter emails through “aliases”. For instance, you can assign a specific alias to inquiring customers as a way to filter this type of email.
One type of alias you can create is by adding a plus sign to your existing email address. Give this address out to specific senders, and emails sent to this alias will then automatically be sent to your original inbox.
2. Remove Unnecessary Tabs
If your inbox is looking too cluttered, removing tabs — such as the “Promotions” tab — is a good way to make the interface look cleaner.
Here’s how to remove unnecessary tabs:
- Select the “Settings” icon at the top of your inbox.
- Click on the “Inbox” tab in Settings.
- Find “Categories”, and then select the tab/tabs you want to remove.
- Scroll to the bottom of the screen, and click on “Save Changes”.
3. Use Labels
Using labels is a great way to organize your emails by color. Labels group emails from a particular sender and help you find an email easily. Here’s how to create labels to organize your inbox:
1. On the left panel of your inbox, find “Labels”
2. Select the plus sign next to “Labels” and type out a name.
3. Next, click on “Create” to activate your new label.
4. Scroll to the bottom of the screen, and click on “Save Changes”.
To apply your new label to an email, select the email and then click on the label icon that appears under the search bar.

You can see a list of your labels on the left pane under the heading “Labels”. You can also give colors to a label by clicking on the three dots in front of its name and choosing the label color from the menu that pops up.
4. Star important emails
If you want to highlight important emails among others, Gmail lets you add a star icon to flag them. While it automatically marks some emails as important based on its algorithm, you can manually add or delete stars to highlight emails of importance. The more you add or delete stars, the better Gmail’s algorithm gets at identifying important emails.
To add stars to important emails, follow these steps:
- Login to your Gmail account and open the inbox.
- Find the email you want to mark as important and click on the star icon (which appears before the sender name).
- To see all your starred emails, click on the “Starred” panel in the left panel of your inbox.
5. Archive emails
Moving emails to the archive folder is a simple way to tidy up your inbox. Once emails are archived, they get removed from your inbox but remain under the “All Mail” tab until you delete them. You can also search for archived emails through the search bar.
Here’s how to archive emails:
- Select one or more emails you wish to archive from your inbox.
- Click on “Archive” (the file-like icon) on the taskbar at the top of your inbox.

6. Enable Hover action
Another feature Gmail recently added is the “Hover” action. It allows you to hover over the email with your cursor and take action without having to open the message. By hovering over the email, you can archive, delete, mark as read, or snooze an email.

This simple one-click action makes organizing your inbox super quick and straightforward.
To enable Hover actions, follow these steps:
- Click on the settings option (the gear icon) at the top of your inbox.
- Select “View all settings” and click on “General”.
- Find “Hover Actions” and choose “Enable”/ “Disable”.
- Finally, scroll down and click on “Save Changes” when you’re done.
Organizing your inbox has never been easier with Gmail rules and other handy features. Follow the steps we’ve outlined above to keep your inbox tidy and ensure you never miss an important email again.
Track emails, email reminders & templates in Gmail for free
Upgrade Gmail with the features it’s missing
Add to GmailDavid Campbell
David Campbell is the editor of the Right Inbox blog. He is passionate about email productivity and getting more done in less time.