There are a number of scenarios in which you might need to change your Gmail address: you’ve switched jobs, gotten married and changed your name, or perhaps the email address you set up back in 2003 looks a bit tired all of a sudden.
Whatever the reason, here’s how to change your Gmail address and make sure you don’t lose any important data along the way.
*** SUPERCHARGE Your Gmail account with this FREE chrome extension ***
Creating a New Gmail Address
Within Google, it’s not possible to change your email address – therefore you need to create a new one.
To create a new email address, you need to set up a new Gmail account:
Step 1. Go to the Google Account creation page.

Step 2. Enter your first and last name and choose your new username. This will be your new email address.
Step 3. Choose and confirm a Gmail password.
Step 4. Click Next.
Step 5. Select a phone number and recovery email address, and enter your date of birth and gender.

Step 6. Agree to the Google Terms of Service and Privacy Policy, and click Create Account.
Setting Up Email Forwarding in Gmail
Once you’ve created your new email account, you may want to still continue receiving emails that are sent to your old email address. To do that, you’ll need to forward those emails to your new account.
To set up email forwarding follow these steps:
1. Go to Gmail, and sign in using your previous Google ID (i.e. the email account you want to forward messages from).
2. In the top right, click on the cog, and then Settings.
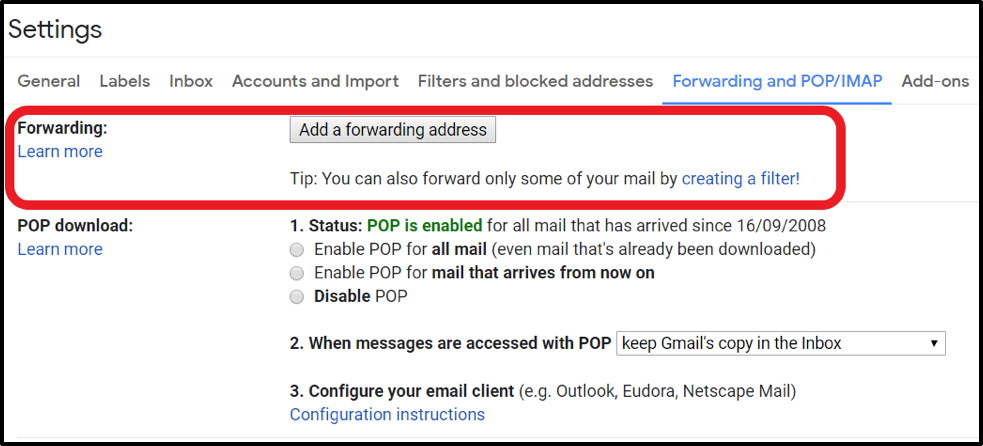
3. Click the Forwarding and POP/IMAP tab.
4. In the Forwarding section, click on Add a forwarding address.
5. Enter the email address to which you want to forward messages (i.e. the new address you’ve just set up).
6. Click Next > Proceed > OK.
7. You’ll then be sent a verification to that new address, so click on the verification link within the email.
8. Return to the Settings page in your old account, refresh your browser, and navigate to the Forwarding and POP/IMAP tab.
9. In the Forwarding section, select Forward a copy of incoming mail to.
10. It’s recommended that you choose to keep a Gmail copy in the inbox.
11. Click Save Changes.
To reverse this and cancel forwarding, go back into Settings, and in the Forwarding and POP/IMAP tab, click Disable forwarding.
Changing Your “Send Email As” Name
You have the option to change the name that shows up in someone’s inbox when you send them an email. For example, let’s say you currently show as “John” in your recipients’ inbox, but you’d prefer your full name of “John Smith” to appear instead.
1. Go to Gmail.
2. In the top right, click on the cog and then Settings.
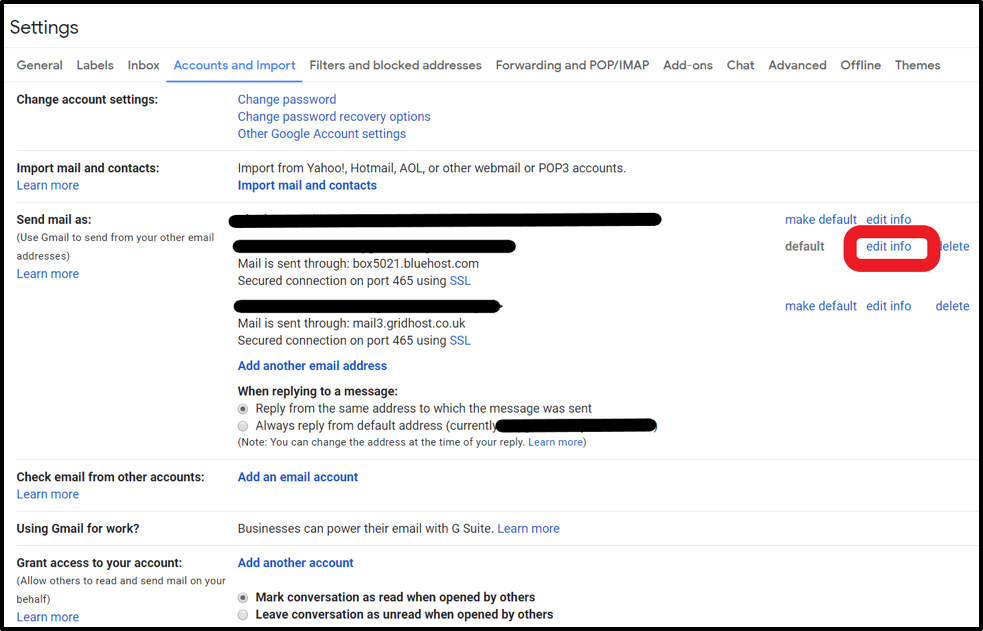
3. Click on the Accounts and Import tab.
4. In the Send email as section, click on Edit info.
5. Add the new name you want to show up when you send messages.
6. Click Save changes at the bottom.
Additional Reading: How to Change Gmail Account
Removing or Adding ‘dots’ in Your Email Address
As mentioned above, you usually have to create a new Gmail account in order to set up a new email address. There’s one exception, and that’s if you want to tweak your email address slightly to remove the dots, if you have them.
If your email address is john.smith@gmail.com, but you want it to be johnsmith@gmail.com, you don’t need to do anything. Google understands them as the same address, so you can just start using the email address you prefer and your emails will reach your inbox.
Adding another login email to your account
1. Log in to your Gmail account.
2. Click on your profile picture in the top right, and click on Google Account.
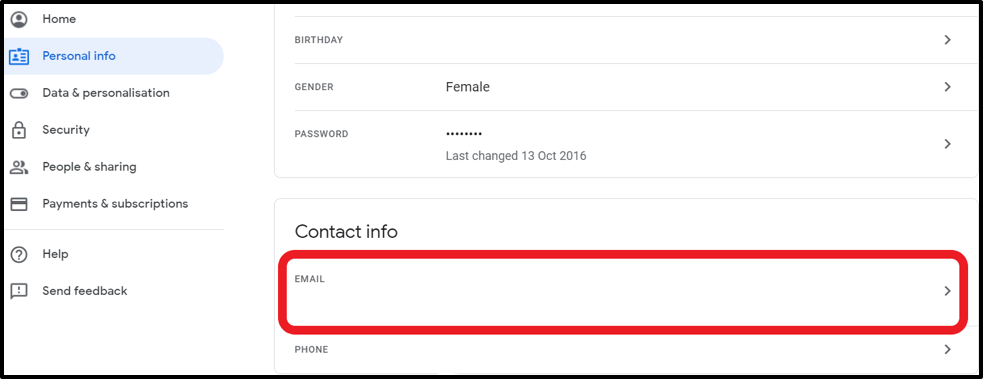
3. In the Personal Info tab, click on the arrow next to Email.
4. Click Advanced.
5. In the Alternative Emails section, click Add Alternative Email.
6. You then need to enter your password to confirm it’s you making changes.
7. Enter your alternative email and click Add.
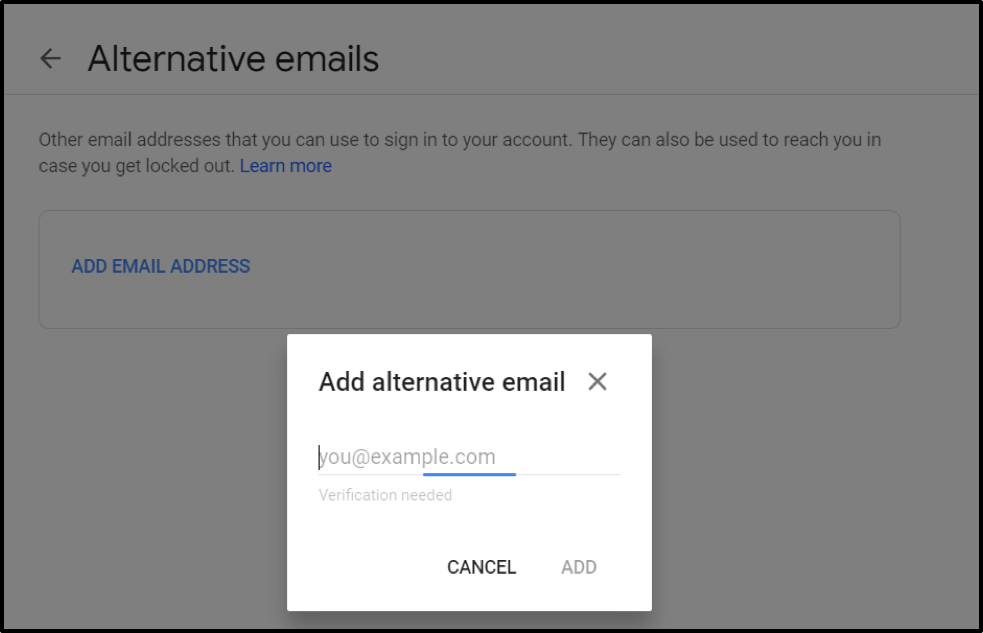
8. Return to your inbox, where you’ll receive a verification email with the new changes. Click on the link to confirm the change.
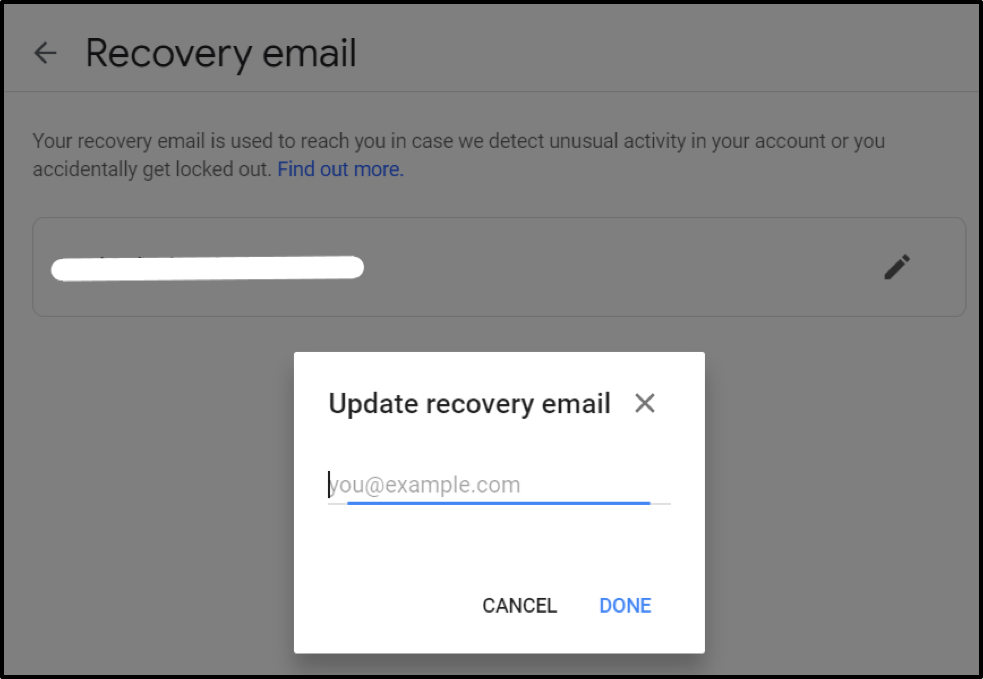
How to Change your Recovery Email in Gmail
Your recovery email is the email address you would use to access your account should you get locked out; for example, if you forgot both your username and password, you’d need to use your recovery email address.
To change it:
1. Log in to your Gmail account.
2. Click on your profile picture in the top right, and click on Google Account.
3. In the Personal Info tab, click on the arrow next to Email.
4. Click Recovery email, and then enter your password to confirm it’s you.
5. Enter the new email address you’d like to use as your recovery email.
5 Things You Need To Do Once You’ve Changed Your Gmail Address
1. Update Your Email Address on All Your Accounts
The annoying part of changing your email address is updating the information on all of your online accounts. First of all, you have to remember the accounts you’ve signed up for using your previous email address, and secondly, you need to log in and update your details.
This step is infinitely easier if you’ve used a password manager, which holds all your login details in a central account. If you have a password manager, then set aside some time to go through all your online accounts and update your email address.
If you haven’t been using a password manager, then open up a spreadsheet and list out all your online accounts – your social media, online banking, shopping sites, blog subscriptions, and so on. One way to remember them is to perform a search in your email account using keywords such as “unsubscribe,” “thank you for registering,” or “welcome to,” and you’ll be able to locate emails from some of the accounts you’ve registered with.
2. Tell Your Friends and Family
This step is often overlooked, but it’s important that you let your friends and family know that you’ve changed your email address so that they can update their address books.
The best way to do this is to email them directly using your new email address. Depending on the number of contacts, you could email everyone individually. Be careful to BCC everyone on your lists so you don’t end up sharing email addresses of those who’d rather stay anonymous.
3. Update your Email Signature:
Review and update your email signature in your new Gmail account. Update any relevant contact information, such as your name, job title, phone number, and URL. This will ensure that your email recipients have accurate and up-to-date contact details when communicating with you.
4. Transfer data and files
If you have important emails, contacts, or files associated with your old Gmail account, consider transferring them to your new account. You can use Gmail’s import/export features to transfer emails and contacts. You can also use services like Google Drive or other cloud storage providers to transfer files and documents. Make sure to back up any crucial data before initiating the transfer.
5. Set up Email Forwarding
To ensure you don’t miss any important emails sent to your old Gmail address, set up email forwarding. Once you’ve broken the news, it’s time to set an autoresponder on your old email address, redirecting your contacts to your new address. Eventually, you’ll find that fewer and fewer people will be contacting your old address and it’ll gradually cease activity.
Supercharge Your Gmail with Right Inbox
We all love Gmail – it’s one of the easiest email providers to use and has a bunch of features that other email providers just don’t have, but that doesn’t mean it’s perfect. That’s why we created Right Inbox to make your workday even more efficient and productive.
With Right Inbox, you can take advantage of our email reminders feature, which reminds you about important emails so you don’t have to worry about forgetting to follow up. In addition, our email templates allow you to build templates and insert them into your emails with a click of a button – no more wasting time repeatedly typing out the same emails.
Click here to install Right Inbox for Gmail.
Track emails, email reminders & templates in Gmail for free
Upgrade Gmail with the features it’s missing
Add to GmailDavid Campbell
David Campbell is the editor of the Right Inbox blog. He is passionate about email productivity and getting more done in less time.